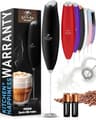
Method 1: a latte without an espresso machine
This is the moka pot and frother route. It works just as well with an AeroPress as the brewer, because the idea is the same: make a small amount of strong coffee, then add hot frothed milk. With an AeroPress, use less water than you would for a mug so the coffee comes out concentrated. Coffee-to-water ratio explains how strength works.
- Get the grind right. A moka pot wants a grind somewhere between drip and espresso. If you buy pre-ground coffee, a bag sold for espresso or moka is usually close. Best coffee for a moka pot has bags that suit it.
- Fill the bottom chamber with water up to the small safety valve on the side, and never above it.
- Fill the basket with coffee and level it off without pressing it down, then screw the top on firmly.
- Heat it on medium. When the coffee starts to gurgle and sputter into the top chamber, take the pot off the heat. Letting it carry on just pushes out harsher, more bitter coffee.
- Heat the milk while it brews.With an automatic jug, pour in cold milk up to the line marked inside and press the button, and it heats and froths in one go. With a handheld frother, first heat the milk in a small saucepan or a microwave-safe jug until it’s hot and steaming but not boiling.
- Froth it. Hold the handheld whisk just under the surface to pull in air, then lower it to spin the milk smooth. Tap the jug on the counter to pop any big bubbles, and swirl.
- Put it together.Pour the coffee into a warm mug. Pour in the milk while holding back the foam with a spoon, then finish with a thin spoonful of foam on top. Much more foam than that and you’re making a cappuccino.
How much coffee does a pot make? The cup numbers on a moka pot are espresso servings, not mugs. Bialetti puts each one at about 2 oz. So the 6-cup Moka Express makes the coffee for about two milky drinks, and a 3-cup makes one small latte. Our best moka potspage has the full size table, plus the one catch: the classic aluminum pot won’t work on an induction cooktop.
Method 2: a latte with a Nespresso
A capsule machine takes the grinding and the stove out of it. The only decision that really matters is the size of coffee you brew.
- Brew the smallest, strongest size.On an Original-line machine, that’s the espresso button, not the lungo. On a Vertuo, use an espresso-size capsule, the smallest of the six Vertuo sizes, which Nespresso lists as a 40 ml espresso, not a mug-size one. On a Vertuo, the barcode on each capsule sets the brew, so the capsule you choose decides the size, not the button.
- Froth the milk while it brews. An automatic jug like the Aeroccino 3 does hot froth at the press of a button. A handheld frother works too, with the milk heated first.
- Put it together the same way as above: coffee first, then the milk, then a thin layer of foam on top.
There are two shortcuts, and both cost a lot more than a machine plus a frother. The Nespresso Lattissima One has the milk system built in: you fill its single-serve jug, press one button, and it pours the whole latte. The Vertuo Creatista adds an automatic steam wand with three temperatures and three textures. Either one is worth it only if the person will genuinely make a milk drink every day.
One compatibility rule before you buy capsules: Nespresso says Vertuo pods are “compatible only with Nespresso Vertuo coffee machines”, so check which line they own. Best Nespresso machines explains the two lines, and gifts for pod coffee lovers shows how to tell which pods someone uses just by looking.
Method 3: a latte with an espresso machine
This is the cafe method, and the only one that makes true steamed microfoam. The espresso comes first; the milk is a separate skill.
- Make a shot.Pull a single or double shot of espresso. The National Coffee Association gives a 1:2 ratio of dry coffee to brewed espresso over 20 to 30 seconds. If that’s new to you, how to make espresso at home covers dialing it in.
- Start with cold milk in a cold pitcher,filled to below the bottom of the spout, because milk grows as it’s steamed.
- Clear the wand. Open the steam for a moment to blow out any water, then put the tip just under the surface of the milk.
- Add air, briefly.Open the steam and let the tip pull air into the surface for a second or two. You’ll hear a light hiss. Keep this short for a latte, because more air means more foam, and more foam means a cappuccino.
- Spin it smooth. Lower the tip slightly so the milk spins in a whirlpool. That breaks the bubbles down into smooth microfoam and heats the milk evenly.
- Stop by feel. When the pitcher gets too hot to keep your hand on comfortably, turn off the steam. Wipe the wand and blast a little steam through it straight away, before the milk dries on.
- Tap, swirl, pour. Tap out any big bubbles and swirl until the milk looks glossy. Pour it into the shot from a little height, then bring the pitcher down low at the end to lay the foam on top.
On a machine with automatic milk frothing, steps 3 to 6 happen for you. Breville says the Bambino Plus makes “silky, velvety microfoam milk automatically with 3 adjustable milk temperatures and 3 levels of texture”, and it still lets you steam by hand if you want to learn. It also comes with a 16 fl oz (480 ml) stainless steel milk jug, so you don’t need to buy a pitcher. On a manual-wand machine, a proper pitcher with a pouring spout is the one accessory worth adding: best espresso accessories has one. For the automatic-or-manual decision itself, see Bambino vs Bambino Plus. If they’re weighing a machine with a built-in grinder, see Bambino vs Barista Express.
Which milk froths best
Whole milk is the easiest to froth well, because its fat and protein make a stable, creamy foam. For plant milks, look for the “barista” versions. Standard oat and almond milks tend to separate or won’t hold a foam, and the barista versions are made specifically to fix that. It’s worth knowing if the person you’re buying for doesn’t drink dairy. Whatever the milk, start it cold. Cold milk gives you longer to froth it before it gets too hot.
An iced latte, briefly
The same idea works cold. Pour the strong coffee over ice, add cold milk, and top it with cold foam. The Aeroccino 3 has a cold froth setting as well as a hot one, so it handles this at the press of a button. For iced coffee more generally, see how to make iced coffee.
Mistakes that make a homemade latte disappointing
- A weak base.This is the most common one by far. Make less coffee, stronger. Don’t top up a full mug of drip coffee with milk and expect a latte.
- Boiling the milk. Milk that has boiled tastes flat and cooked. You want it hot and steaming, never bubbling.
- Too much foam.A latte has a thin layer on top. A deep cap of foam makes it a cappuccino, which is fine if that’s what they like. Latte vs cappuccino explains the difference, and what is a flat white covers the version with almost none.
- Overfilling the jug. Milk gets bigger as air goes in, so a jug that starts full ends up on the counter.
- Delicate light-roast beans. Milk flattens the subtle flavors a light roast is prized for. A roast with body and a bit of chocolate to it stands up to milk far better. See best espresso beans and light vs dark roast.
- The wrong capsule size. A mug-size capsule under frothed milk is the capsule version of the weak-base mistake.
- Leaving milk to dry. Rinse the frother, jug or wand straight after use. Dried milk is much harder to shift, and it spoils the next batch.
If you’re buying this as a gift
For a latte drinker with no machine, a moka pot plus a frother makes a complete, inexpensive gift. For a Nespresso owner, the Aeroccino is the one addition that turns their shots into lattes. For someone ready for the real thing, the Bambino Plus steams the milk for them. And if all you know is “they love lattes”, a frother on its own is the safest bet. See best milk frothers for the range, or gifts for espresso lovers if they already have a machine.